Steyr 1500A Tunisian Oasis Diorama
By Peter Cottingham
Box Art
I built this venerable old Tamiya kit about
12 months ago, and, as expected with a Tamiya kit, it fell together easily. The
only tweaking to the basic kit was to open the bonnet flaps and add a few dings
and scratches.
With a DAK scheme, and Tunisia in
particular, in mind I gave the Steyr a dusty finish with a well used, but not
dilapidated, appearance. Although I had no proof for or against I decided to
remove the rears seats and create a makeshift, long range supply vehicle,
loaded with fuel, ammo and water, and settled on idea for a diorama base set in
an oasis.
For the supplies I used resin accessories
painted up with acrylics and AK washes, pigments and filters. With these all in
place it was time to begin the base.
The finished Steyr with supplies
To start with I found some lovely reference
photos of the Chebinka Oasis in Tunisia. It isn’t too hard to imagine that this
spot could have actually seen DAK troops and vehicles during the war. I then
sketched out a simple plan to mark out where I wanted the main elements to go.
Chebinka oasis in Tunisia
The basic master plan
Using some sturdy Styrene sheeting I built
up the walls around a picture frame and began layering cut sheets of foam board
to build up the rock walls and ground areas.
Styrene sheet walls around photo frame
Foam board rock layers
The foam board layers were then trimmed
back to create more believable rock walls. I usually resort to using DAS clay
for my groundwork but these vertical rock walls posed a problem with the clay
adhering to the foam board. I then came across Woodland Scenics “Foam Putty”
and found it to be an excellent medium for creating rock faces. It took a bit
of trial and error to get right, and the long drying times were frustrating,
but eventually I had something I could live with.
Woodland Scenics Foam Putty was ideal for
the rock faces
The final rock walls carved and ready for
priming and paint
I then primed the rocks with a rattle can
general purpose primer, spraying from a distance so that the paint was almost
dry when it hit the rock faces. This gave a slightly grainy surface which is
ideal for paint and washes.
Acrylic paints were applied heavily thinned
and then I went all over the rocks with a mixture of pigments and washes to
simulate the subtle strata colours. A dark wash helped to bring out the deeper
cracks and then a light spray of deck tan colour was applied with the Airbrush
from above to give highlights.
The final rock colours and early
groundwork.
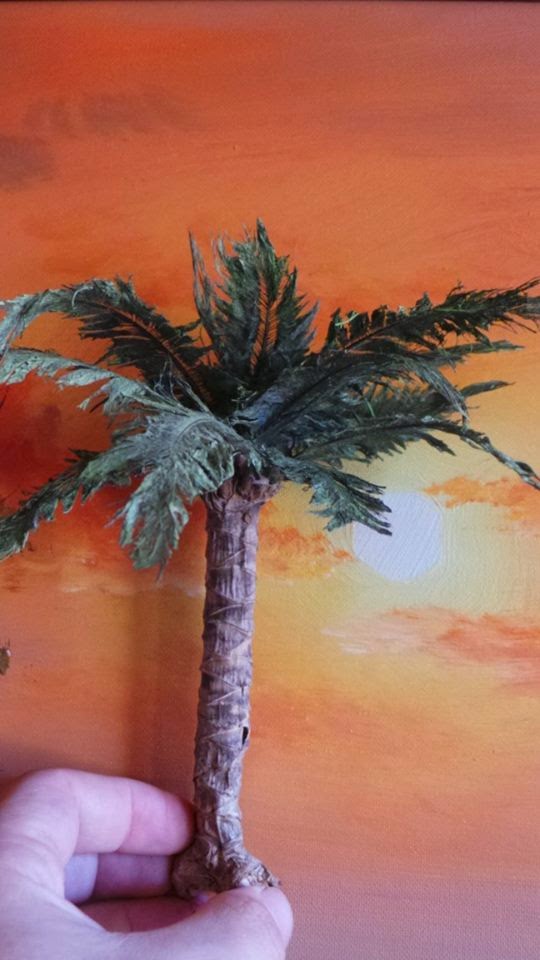
The pic above shows I’d started on the 2
figures and some small twigs were placed where I hoped to add a palm tree and
shrubs. I created the palm trunk from milliput and carved in some simple
pattern with a scalpel. The leaves are from Js Works in Germany, re painted to
a more realistic desert palm hue.
Palm trunk from Milliput and Leaves from Js
Works, Germany.
Final adjustment of vehicle and figures
For the ground work I used a range of
gravel sizes from approx 1cm all the way down to fine sand (from my garden). I
applied the gravel and sand in layers using diluted PVA glue to stick each
layer down. It was more realistic to start with the larger sizes and end up
with a layer of the finest sand.
Once the ground was set I then sprayed a
graduated layer of turquoise acrylic into the pool area and gave the waterfall
a wash and detailing with AK enamel light grime and dark grime. I also added a
few small shrubs and reeds around the water’s edge.
Gravel and sand groundwork with greeny blue
spray in the pool areas
The water was created with Woodland Scenics
“realistic Water” liquid. Easy to use though patience is required as it must be
added in thin layers and allowed to set between each layer. Keeping the layers
dust and dirt free was difficult but in the end I settled for a compromise with
a few natural looking cat hairs and dust specks adding to the authenticity ;0)
Waves and the waterfall were created by
layering on thin applications of the realistic water through a small pipette
and the waterfall was also gently teased with a brush to give the white foam
effect.
Final tweaks included the addition of some
dead palm fronds under the trees, a dusting of light sand pigments and a few
more reeds to cover up annoying bubbles that had formed in the water. Then I
took the diorama out into the garden to get some daylight photos. Here’s the end
result which I am rather pleased with :0)
Peter Cottingham
Modeler Peter Cottingham


.jpg)


